Double Exposure Photography: A Beginner’s Guide
Double Exposure Photography: A Beginner’s Guide
Introduction
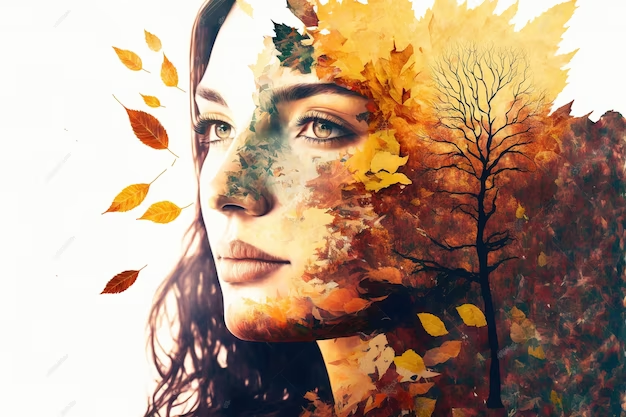
Photography is an ever-evolving art form, with photographers continuously exploring new techniques to push creative boundaries. One of the most fascinating and artistic techniques is double exposure photography. This method layers two different images in a single frame, creating a surreal, dreamlike effect that captivates viewers. If you’re new to this photography method, this guide will walk you through the essentials and help you get started on your creative journey.
As a photographer and content creator, I remember the first time I experimented with double exposure. I had taken a silhouette portrait of a friend, unsure of how the second shot would transform the composition. Adjusting my camera frame for the next step, I found a tree with intricate branches, thinking it might blend beautifully into the contours of the face. The result was a mesmerizing fusion of human and nature, sparking my passion for this technique.
Double vs. Multiple Exposure
- Double Exposure: Two images are merged to create a single, blended composition.
- Multiple Exposure: More than two images are combined, resulting in a more complex and layered visual effect.

How Does it Work?
In Film Photography
- Capture the First Image: Take an initial photo, usually of a silhouette or subject with a clear outline.
- Take the Second image: Without advancing the film, capture another image over the same frame.
- Develop the Film: The final image blends the two photos, with lighter areas of the second exposure appearing more prominently.
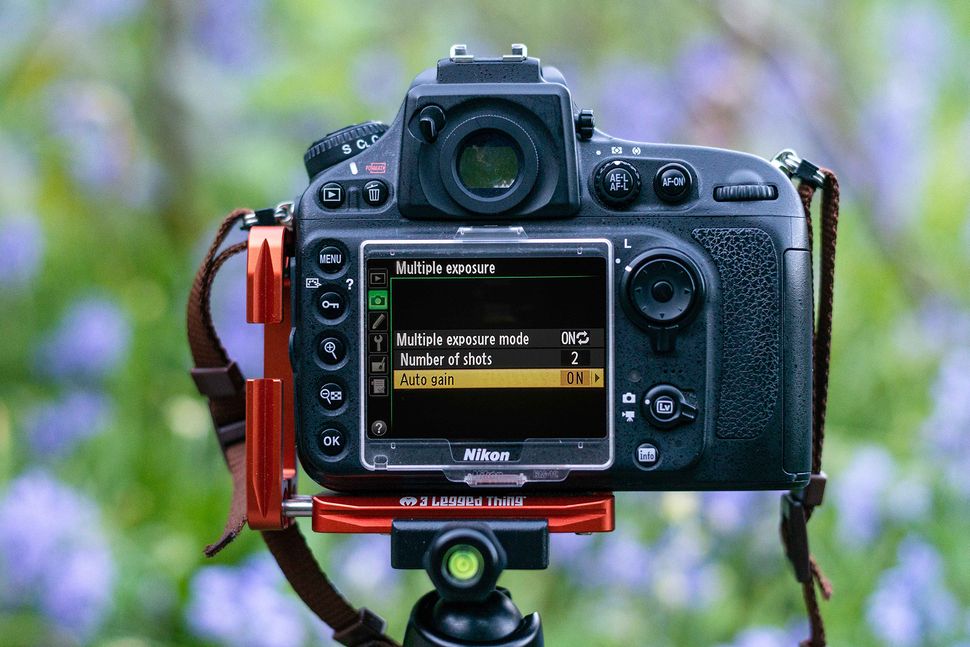
In Digital Photography
Many modern cameras, such as Canon EOS 5D Mark III, Nikon DSLRs, Fujifilm X-Series, and Olympus OM-D E-M5, have built-in double exposure modes. The steps are simpler:
- Enable the Double Exposure Mode in your camera settings.
- Take the First Image, typically a portrait or silhouette.
- Adjust Your Camera for the Second shoot , framing the scene carefully to complement the first image. For example, if your first photo is a person’s face, you may want to position the second photo so that textures like tree branches or clouds align meaningfully with their features.
- Take the Second Image, often a textured background such as trees, clouds, or abstract patterns.
- The Camera Merges Both Images and provides a preview of the final composition.
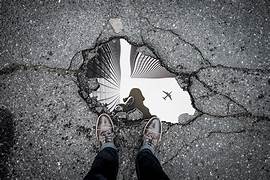
I’ve often found that using natural textures like leaves or flowing water enhances the storytelling aspect of the image. Once, while traveling, I experimented with my own reflection and the rippling surface of a lake. The outcome was unexpectedly poetic, symbolizing introspection and movement.
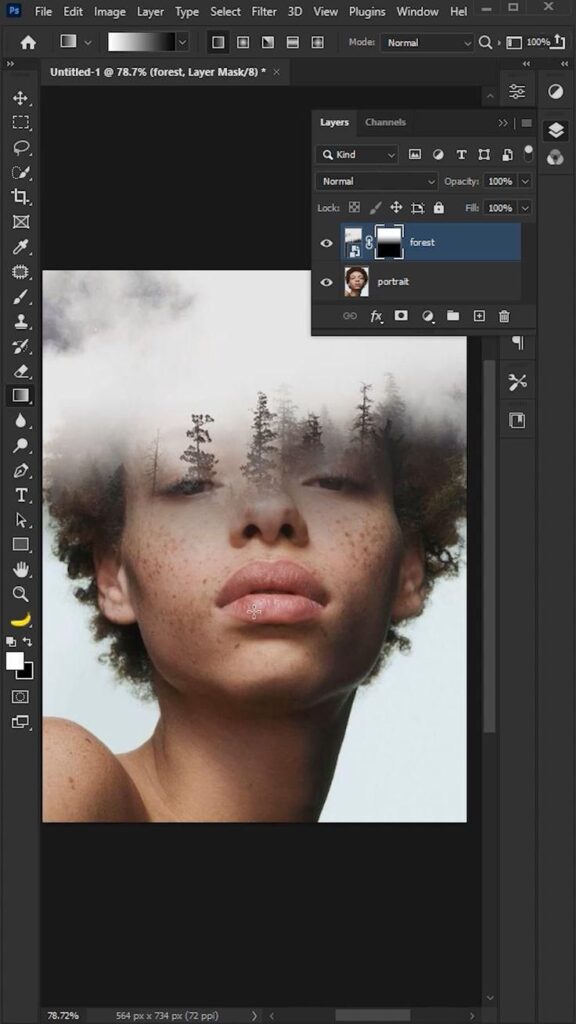
How to Create a Double Exposure in Photoshop
If your camera does not support in-camera double exposure, you can easily achieve the effect using Photoshop:
- Open the First Image (a portrait or primary subject).
- Select the Subject using the Pen Tool or Quick Selection Tool, and remove the background.
- Add the Second Image (a landscape, texture, or abstract pattern) as a new layer.
- Blend the Two Images using the “Screen” blend mode for a natural effect.
- Fine-tune the Contrast, Saturation, and Opacity for a polished look.
6 Essential Tips for Creating Stunning Photos
- Start with a Strong Silhouette: A well-defined subject works best, especially against a bright or plain background.
- Use a Tripod: This helps maintain alignment, especially for planned photo.
- Underexpose Your Subject: Prevents highlights from being blown out and allows better blending of the second image.
- Experiment with Textures: Try different backgrounds like trees, flowers, cityscapes, or abstract patterns to add depth.
- Play with Black and White: Monochrome double exposures often blend more seamlessly.
- Practice and Experiment: The more you try, the better your results will be. Don’t be afraid to make mistakes and refine your technique over time.
5 Creative Ideas
- Portrait + Nature: Overlay a person’s face with leaves, flowers, or a starry night sky.
- Silhouette + Texture: Fill a silhouette with textures like cracked walls, water ripples, or tree branches.
- Cityscapes + People: Merge a person’s profile with a busy cityscape for a cinematic effect.
- Animals + Environment: Blend an animal portrait with its natural habitat.
- Double Exposure Within a Double Exposure: Layer multiple double exposures for a mesmerizing, complex composition.
One of my most memorable shots was a double exposure featuring a dancer mid-spin, blended with the chaotic energy of a bustling city street. The contrast between motion and stillness added a layer of storytelling I hadn’t anticipated.
Conclusion
Double exposure photography is a powerful creative tool that can transform ordinary images into stunning visual stories. Whether you use a film camera, a DSLR with built-in multiple settings, or Photoshop, the key to mastering this technique lies in experimentation and practice. So grab your camera, explore different compositions, and unlock your artistic potential through the magic of double exposure!
Are you ready to try double exposure photography? Share your experiments and creations with us in the comments below!